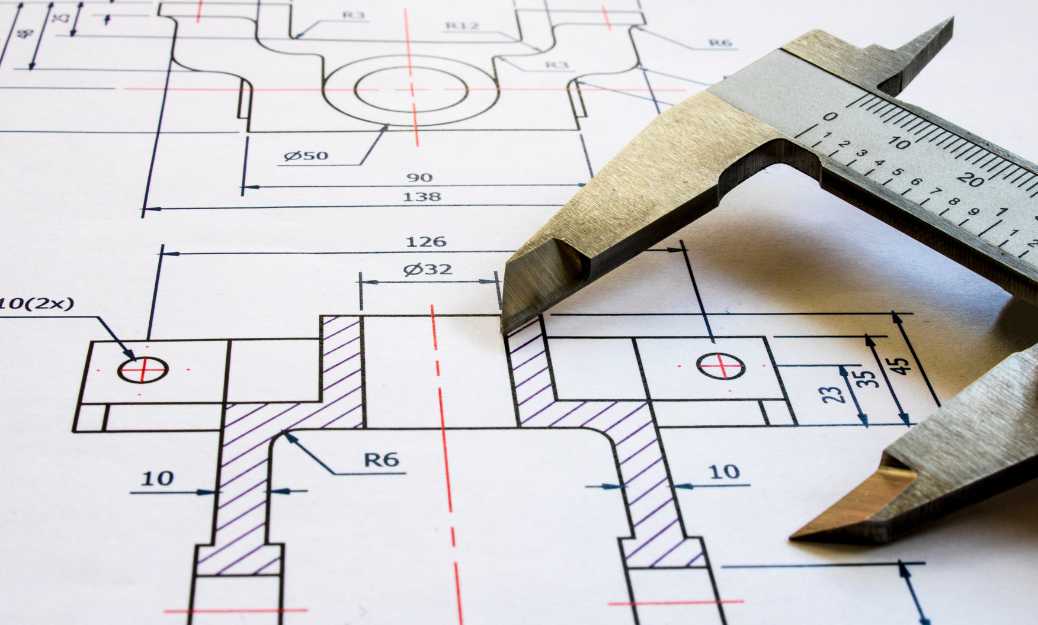
Delimiting is the activity of annotating, with lines, figures, letters and other elements, the data of an object, in a previous drawing of the same, followed by a series of norms and conventions, which are established by legal or social means.
Índice de contenidos
Delimited that means in technical drawing
Dimensioning on technical drawings is done by placing lines on the page to indicate where objects are located. To do this, the object itself must first be drawn. Once you’ve drawn the object, you need to place dimensions on it. Dimensions are used to show how far something is from something else. For example, if you were measuring the length of a table, you would use a line to represent the distance between the floor and the top of the table.
Many times it is not only asking the dimension that it means, but also its application in specific branches such as technical drawing. Sizing a floor plan is a very important step when designing a house, since it will help you visualize the space and determine where each element that composes it will go and their spatial relationship between each one.
Well, now let’s clarify some fundamental points about dimension lines in technical drawing.
How to dimension a plane
It is of vital importance that the dimension is not difficult to interpret and leads to mistakes, for this reason it is important to respect some rules that must be followed whenever we are going to put the measurements on a plane. Here we are going to show you the different types of lines that are handled and some recommendations on their use.
If you are interested in this article, you may also like this article on isometric drawing that we also have on this site.
Here we share a good video on principles of dimensioning in technical drawing.
Types of lines to dimension in technical drawing
Here we present the most common types of lines that can be used to limit a plan, drawing or figure in technical drawing.
1. Center lines are used
- Represent symmetry,
- Represent movement paths,
- Mark the centers of circles and the axes of symmetrical parts such as cylinders and screws.
2. Gridlines are used to show where an object is split to save drawing space or to reveal internal features.
3. Fault lines come in two forms:
- freehand thick line
- A long thin line drawn with zigzag lines.
4. Dimension lines and extension lines are used to indicate the size of features on a drawing.
5. Section lines (hatch lines) are used in section views to represent surfaces of an object cut by a section plane.
6. Ghost lines are used to represent a moving feature in its various positions.
7. The Sewing Lines, to indicate a sewing process or stitch.
8. Visible lines are used to represent entities that are visible in the current view.
9. As you know, hidden lines are used to draw features that are not visible in the current view.
10. Section plane lines are used on section drawings to indicate the location of the section planes.
Recommendations on the use of dimension lines for technical drawing
- Dimension lines must not cross.
- Dimension lines must not cross auxiliary dimension lines.
- Reference lines must not cross.
- The spacing between dimension lines must be consistent throughout the drawing.
- Dimension lines must not overlap drawing lines.
- It is forbidden to measure hidden lines.
- Except in special cases, auxiliary dimension lines must be at a 90 degree angle to the dimension line.
- The dimensions must be placed in an orderly and aligned manner.
- The reference line directed to the circle must be radial.
Dimensioned in AutoCAD

Use this series of steps to dimension objects in a project drawing in Autocad.
In the documentation phase of a project, detailed drawings of objects must be created. AEC slices can be linked to objects in a drawing or to external references. You can cut objects in the source drawings, such as elements or constructs, or in higher-level drawings, such as views or sheets.
- Open the drawing of the project in which you want to add the measurements.
- It does not have to be the drawing itself in which the object to be dimensioned is located. It can also be referenced from a drawing that is linked to the object.
- Open the tools you need and choose an AEC dimensioning tool. If this is the case, search within the palette to see the tool that suits your specific need.
- Inside the Properties palette, expand Basic General.
- Select a style.
- In the drawing range, pick the objects you want to dimension.
- Press Enter.
- Indicates the position of the new dimension:
If you want to insert the dimension group parallel or perpendicular to the object with the measurements then you must drag the selection handle in the direction you want and place the insertion point on the drawing.
Runs the dimension group with a given rotation
Write RO. The Rotate command allows you to rotate objects around a point on your drawing canvas. To do this, select the objects you want to rotate and then click the Rotate button. You can specify the angle of rotation using the Angle option.
Embed the dimension group parallel to a non-dimensioned object within the drawing
Aligning a box is very simple. First, type the letter A (Align) on the command line. Then, select the group to snap to, press Enter, and click the insertion point on the drawing.
This video can be very useful to see the step by step on how to delimit in Autocad screen engraving, we hope it helps you 😉
We hope that this complete article on bounded has been useful to you and if you have any questions, do not hesitate to leave us a comment that we will gladly answer.

